Houdini task submission
Houdini task submission
Houdini task submission tutorial video
Configure Rendering Environment
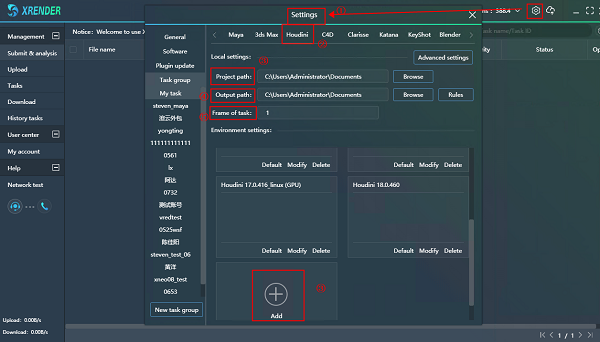
Step 1: Open the setting panel
Step 2: Find houdini in the task group (“My task” in the Task Group)
Step 3: Set the project pass (Not necessary if the file asset uses an absolute path)
Step 4: Set the output path, where you can find the result file (output path can be different for each project)
(Note: You can click the “Rule” button to choose whether to create folders named after “Take name” ”Submit data” “Task ID” when download the result files.)
Step 5: Set the “Frame of task”, of which the default value is 1. For example, if you enter 2, it means each serve will render 2 frames and only need to load once.
Step 6: Choose the software and plugin you need. There are multiple environments can be set while submitting tasks.
(Note: “My task” is the default task group in the XRender Client. You can submit tasks to the default task group or create new task groups as you need.)
About environment settings
Step 1: Click “Modify” to set the default environment or click “Add” to create a new environment
Step 2: Choose the software version
Step 3: Choose the plugin version
Step 4: Move the plugin version to the right
Step 5: Save the settings
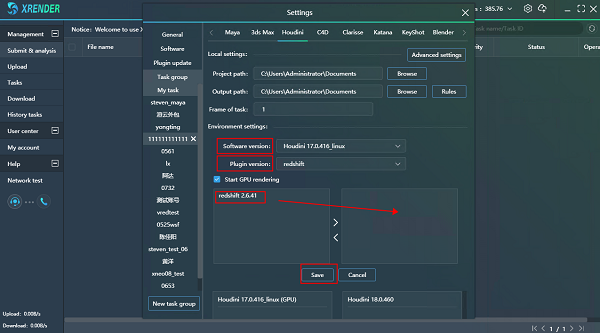
About GPU render
CPU render is set for default. When GPU renderers like Redshift, Octance, Fstorm are used in the project, you will need to check the “Start GPU rendering” to set environment.

About task deletion
Tasks can be deleted in the setting list by click the “X” beside the task group name if no more tasks to render in the group.
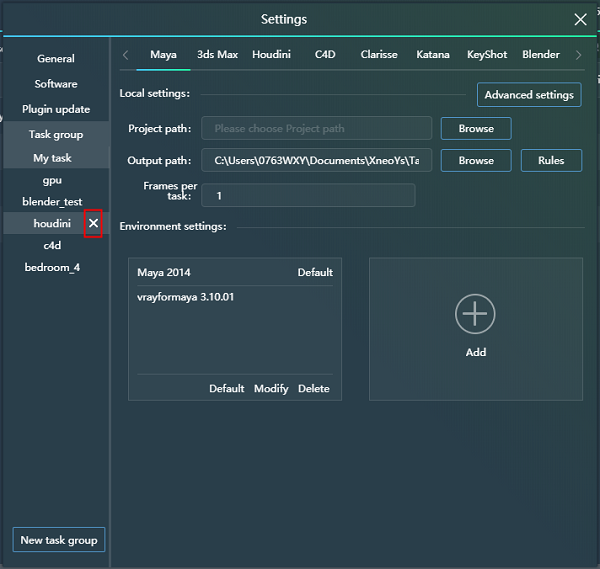
Please note that after the project is deleted, the task rendering records in the corresponding project will also be completely deleted at the same time.
Submit XRender
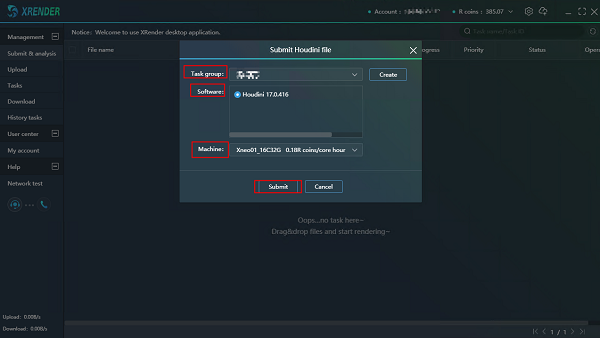
Step 1: Drag the drop your file to XRender client and start to configure the environment
Step 2: Choose a task group or add a new one by clicking the “Create”
Step 3: Choose the environment. If you can’t find the environment you want, you can click “Create” and configure the environment you want at the setting panel
Step 4: Choose the machine you want
Step 5: Confirm the environment and click “Submit”
Task analysis
The intelligent XRender Clinet will analyze your files automatically brfore uploading.
Note: The time of analysis is similar to the time of opening a file. If the file is opened slowly, so will the process of analysis.
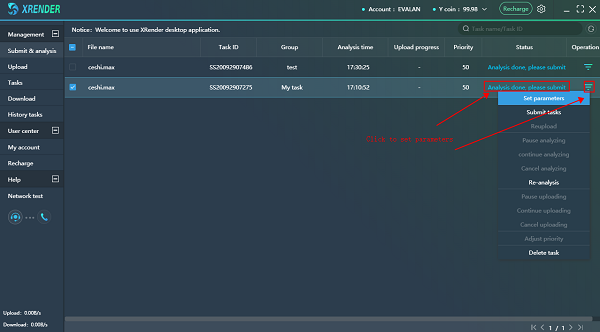
When it shows "Analysis done, please submit", please right-click and set parameters before submit.
You may adjust the basic parameters about rendering in this panel according to your needs and click submit to upload your files.
Confirm rendering parameters
Note: Click “Set parameters” after analysis finished and you can set the rendering parameters.
Click “Ignore and submit” after analysis finished, the parameters settings and confirm step will be skipped and task will be uploaded directly (not recommended)。
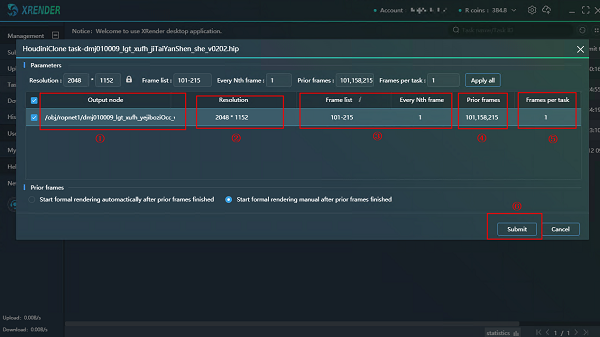
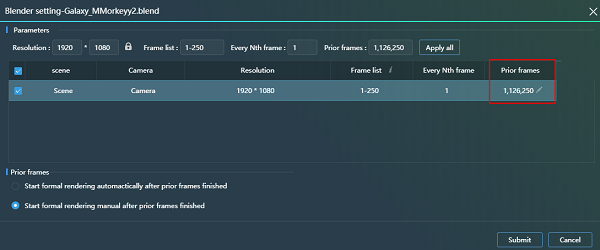
Parameter 1: Output node
Parameter 2: Resolution, modifiable.
Parameter 3: Frame list and Every Nth frame, modifiable.
Parameter 4: Prior frame. Render the first, middle and last three frames by default, modifiable.
Parameter 5: Frame per task. The default value is 1 and if you enter 2, it means each serve will render 2 frames and only need to load once.
Parameter 6: Confirm parameters and apply to all layers. Also you can set different parameters for each layer below, which will not be affected by the parameters above.
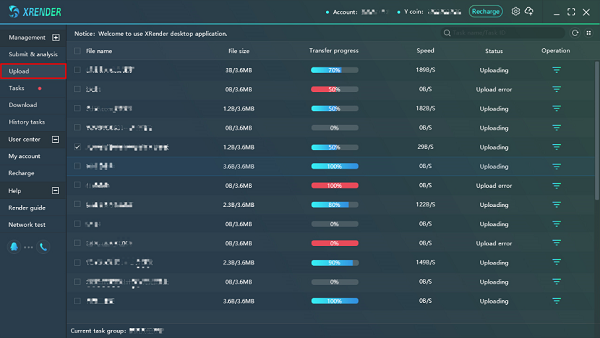
Task Uploading
After confirming the file parameters, you may turn to the “Upload” panel for more details about uploading.
Rendering
XRender client will render the prior frames first, which are usually the first, middle and last three frames for 3d creators to check the render effect. This feature helps to avoid unnecessary loss of cost and time. What more, users can adjust the prior frames according to the demand.
Double click the task or right click the task and choose the [Task details] to view the task details.
If the rendering effect is correct, you may render your project at full speed.
Check render results
Right-click to open the output path and check the render results.